1. A Simple Slideshow has images only, no text, no links.
1. Prepare your images:
- Resize your images to the required dimensions. You can usually find the specific measurements in Your Notes.
- Optimal Image size
- Narrow: 1400 x 500px
- Medium: 1400 x 500px
- Full screen: 1920 x 1080px
- For better Google ranking, include your target keyword in the image file name.
2. Create a simple slideshow:
- In your website's admin panel, navigate to the page where you want to add a slide show to
- Under Add-on Modules select Available Slideshow - Responsive
- Select Slideshow
- Fill in the options.
- Add the slideshow tag
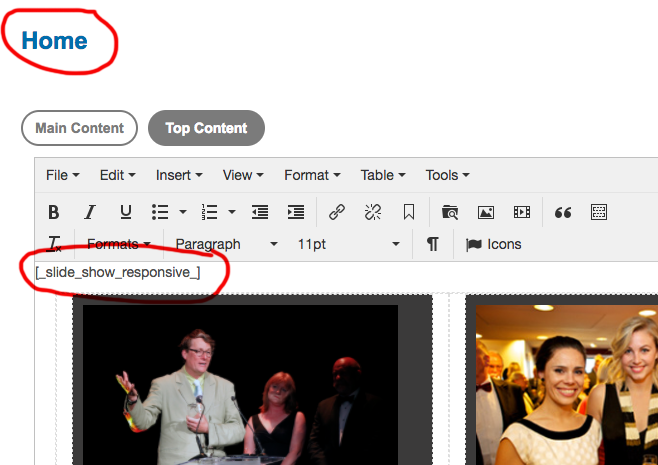
[_slide_show_responsive_1_] to the page content, typically located in Top Content or Extra Content.
- Upload images in the File Manager in the folder that has been automatically created "slideshows/(page or category name)". They will show automatically in the slideshow.
- Exist File manager.
- Save page.
- You won’t be able to see the slideshow in the editor. View page live.
- Empty Cache.
Access an existing Slideshow:
- In your website's admin panel, navigate to the page where you want to add or remove images.
- The slideshow is typically located in Top Content or Extra Content. In the editor, you’ll only see the slideshow tag,
[_slide_show_responsive_1_] not the images.
Adding or Removing Images in a Slideshow
1. Insert/delete or manage Images:
- Click the ‘Insert Image’ icon (a mountain symbol).
- Click the Upload icon (arrow symbol next to the source window).
- In the File manager, open the ‘slideshow’ folder.
- Open the folder for the relevant page to add or delete images.
2. Exit File Manager, Save and View Changes:
3. Empty cache and view live.
Reorder the images on a slideshow page
1. Reorder images
- To reorder images in the slideshow, change the filenames in the File Manager. The images will be ordered numerically and alphabetically.
- Change the 'Order by' options in Add-on Modules > Slideshow - Responsive
2. Save and View Changes:
3. Empty cache and view live.
To change the speed and time of the slideshow
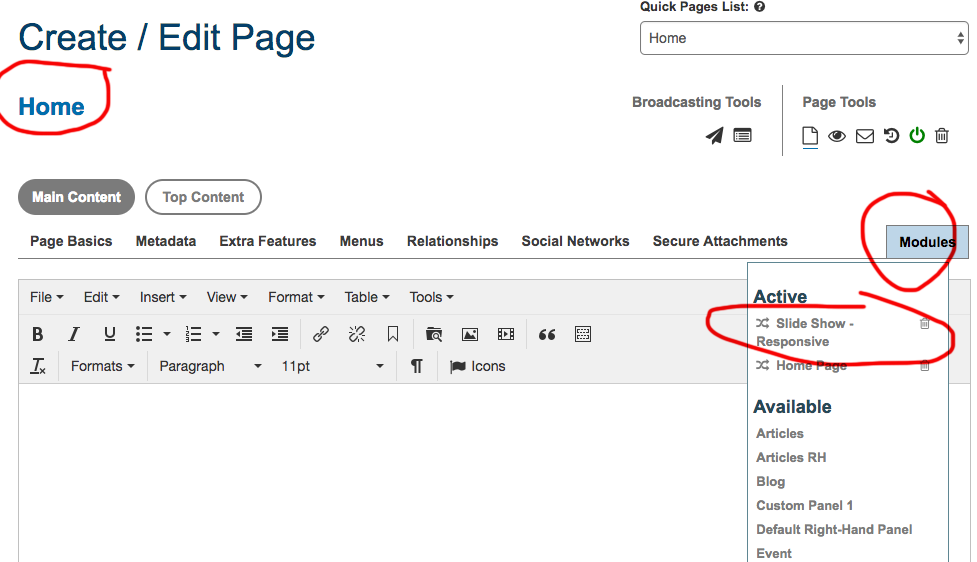
On the right hand side under Add-on Modules/Active modules, select Slide Show - Responsive click on edit icon. Change the speed and timing.
You can also change the order here to random, numerically or alphabetically and add or delete reference dots.
If you are unsure of the size of an image that is already uploaded you can check in the 'File Manager' (where your images are kept).
Change the viewing layout to "list" and it will show you the dimensions on the right.
Or look in your 'Your Notes', and if they aren't in there put them there once you find out what they are.
Exit File Manger, Save and View Changes:
- Exit the file manager by clicking the ‘X’ and save the page.
- Unfortunately, you won’t be able to see the slideshow in the editor; it will appear as a code snippet.
- To preview the slideshow, save the page and click the ‘Eye’ icon in the top-right corner to view it.
Slideshow on a Home page not working?
Reorder the Activated Add-on Modules.
Slide Show - Responsive should sit below 'Home Page' and above any other activated module.
2. Slide Pages
Slideshow with links and editable text.
This type of slideshow has two parts:
- A Host Page (the receiving page the slideshow appears on).
- Slide Pages (with the content) that get assigned to the Host Page.
HOST PAGE
How your Host Page is set up.
Your Host Page (usually a Home Page and in Extra Content) has been set up with this code: [_slide_show_responsive_1_]
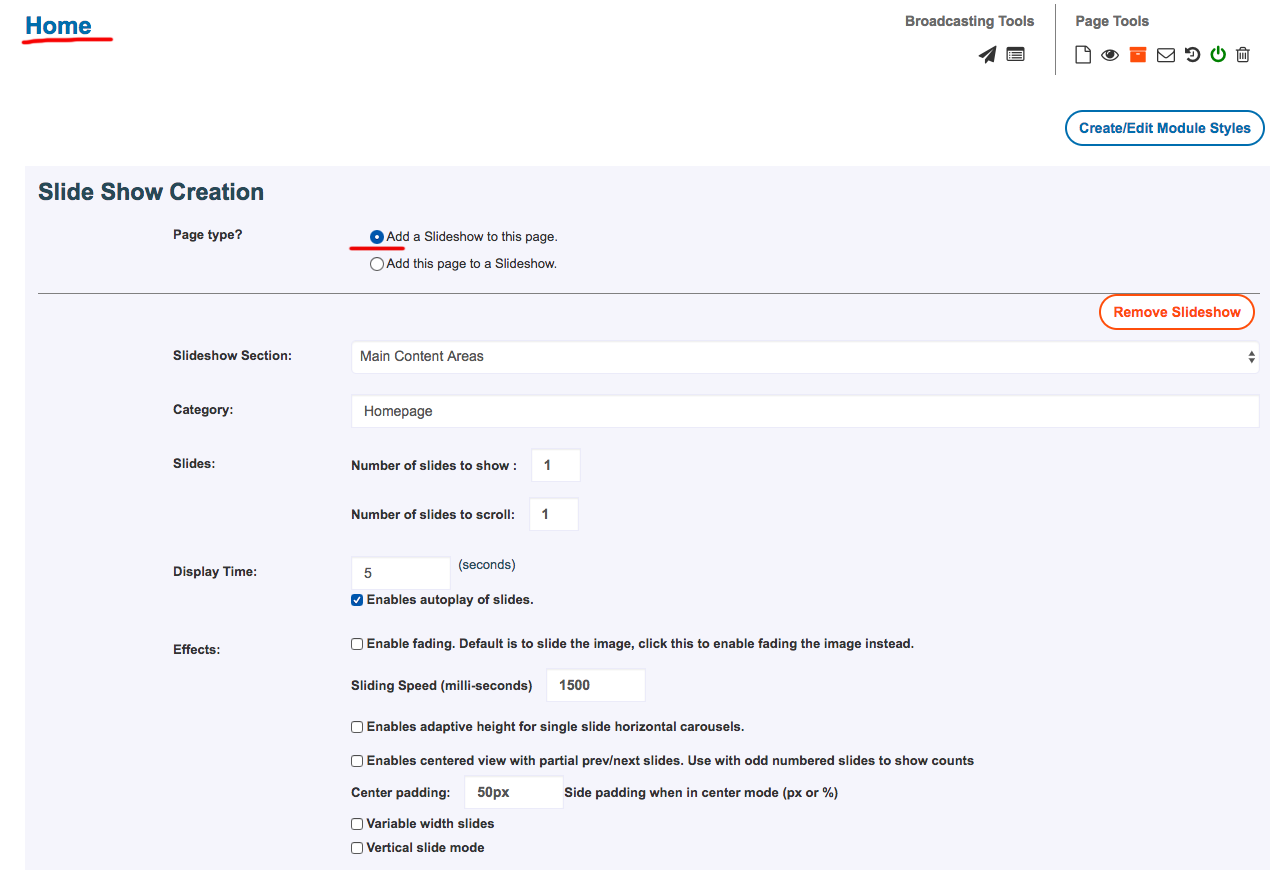
This page must have a Category for it to show a slide.
The Slideshow module has been activated and set to: Add a Slideshow to this page.
Don't untick it unless you don't want the slideshow on there.
The Host Page will receive Slide Pages (SS_number_NameOfPage) that have been assigned to it.
Note: You can have numerous Host Pages receiving the same Slide Pages.
To change the speed, time and ordering of the Host Page
On the right hand side under Module/Active, click Slideshow Responsive. Change the speed and timing.
You can also change the order here to random, numerically or alphabetically and add or delete reference dots.
SLIDES PAGES
How your Slide Pages work
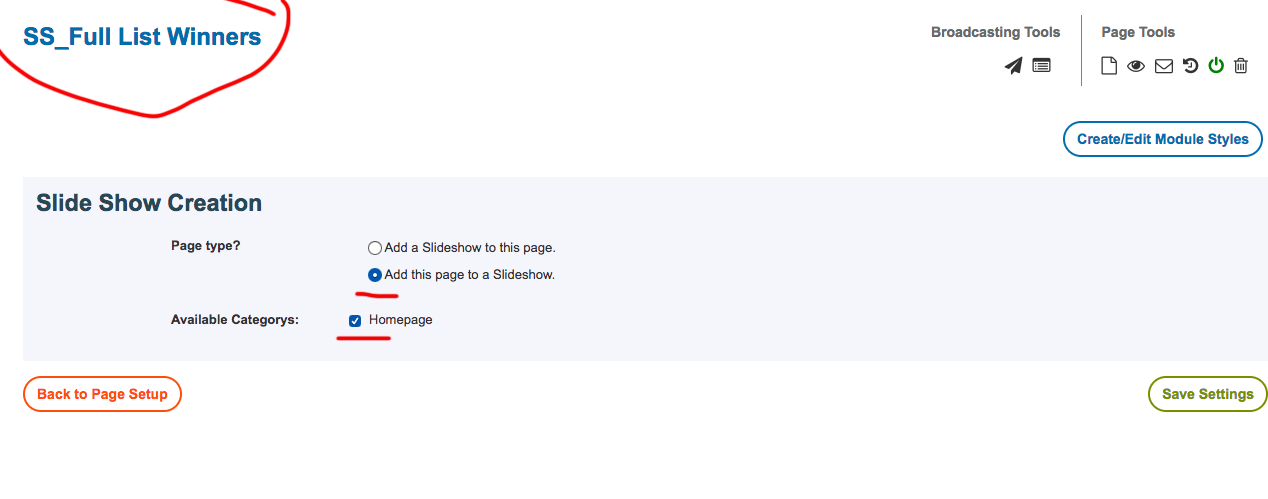
The Slideshow Responsive module has been activated and each page is set to "Add this page to a Slideshow"
-
- Set up your Slide Pages so that they all start with SS_number_NameOfPage and are easy to find.
Note: It is ok to change the Page and Display name of these pages.
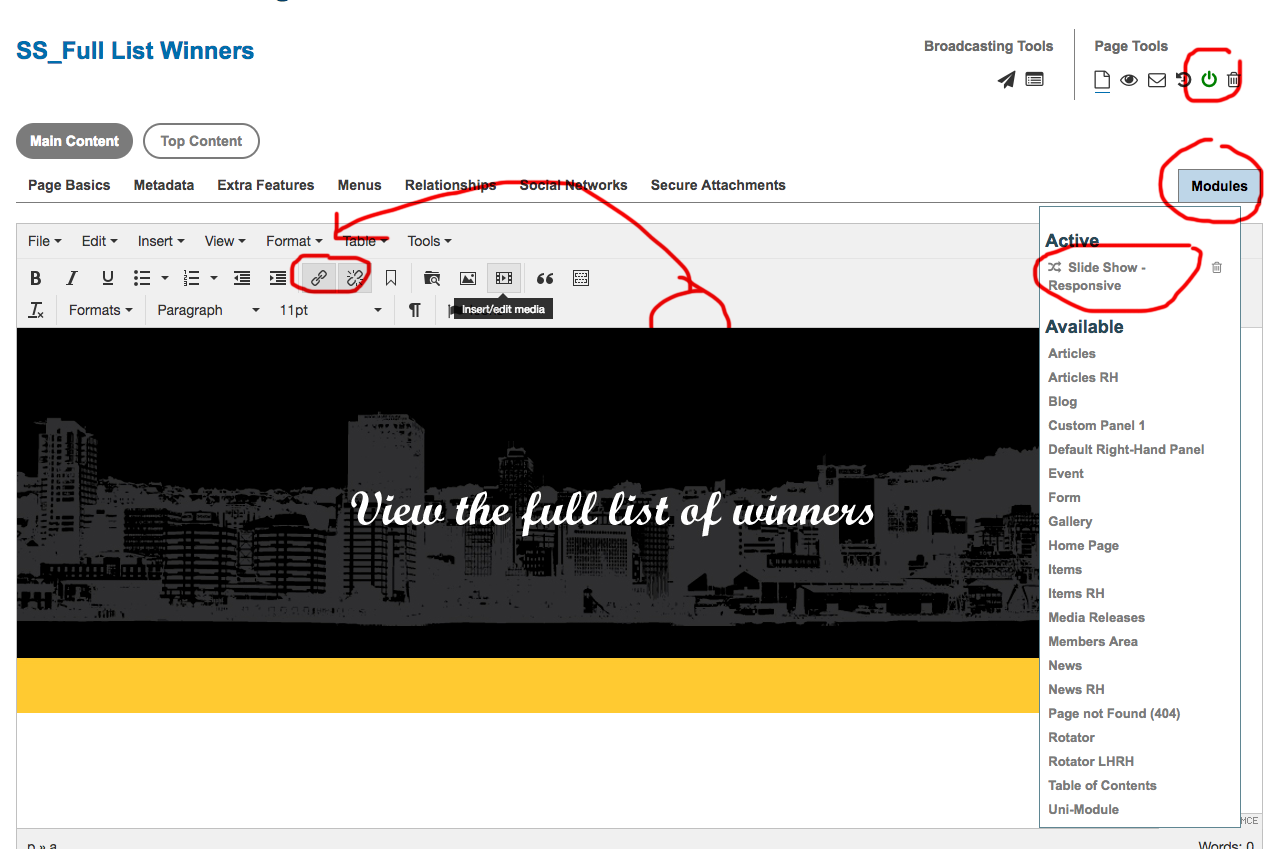
- Add your images and text to the Main Content (this is important), add links if needed.
All images must be the same size.
- SAVE PAGE
- Activate the Slideshow Responsive module and tick "Add this page to a Slideshow"
- You will get a selection of Host Pages to tick and assign your Slide Page to. If no Host Pages appear, no Host Pages have been created or they need to have a category set.
Deleting Slide Pages to your slideshow.
To delete a Slide Page. Use the rubbish bin icon or turn the page off (see below).
Turn on and off a Slide Page
Use the red/green on off icon (top right) or under Page Basics - activate page.
Changing an image on an existing Slide Page
- Select the image in the editing area that you want to replace. (it should turn light blue).
- Click onto the “insert an image” icon, (looks like a photo of a mountain).
- Click onto the icon to the right of the source window (looks like an arrow upload icon).
- If the image is already uploaded find the image and go to point 7 below.
Select a folder in your 'File Manager' directory on the left to upload your file into.
Or create a new folder if needed.
-
Select ‘Upload’ (top left hand icon up arrow). This will take you to your computers directory. Find and select you image.
-
Select 'Open' to upload the image.
-
'Pick' your image by clicking the text pick on you image hover.
Your new image should have replaced the old one on the slideshow page.
To reorder Slides within a slideshow


